Whew! The last end has been woven and my Herlacyn afghan is blocking as we speak.
I promise to do a true FO post soon, but in the meantime, I thought you might be interested in a few quick tips and tricks to help you block everything from scarves and shawls to cardigans, blankets and afghans with greater precision and straighter lines.
If you own the basic plain blocking tiles as I do, straight lines can be a challenge. If you're lucky enough to own blocking mats printed with a grid, you're ahead of the game but you might still find these tips helpful. Blocking wires provide a nice, straight edge, but they don't work for all projects.
Since I like to keep things as simple as possible, here's what I do. First, I connect as many blocking tiles as I need. Then, I tie a slip knot in a piece of string and hook it over one of the nubbins at the top edge of the mat.

I run this string down the full length of the mat and wrap it around the corresponding nubbin at the bottom, making sure it's taut and straight to form a guideline for the left edge.
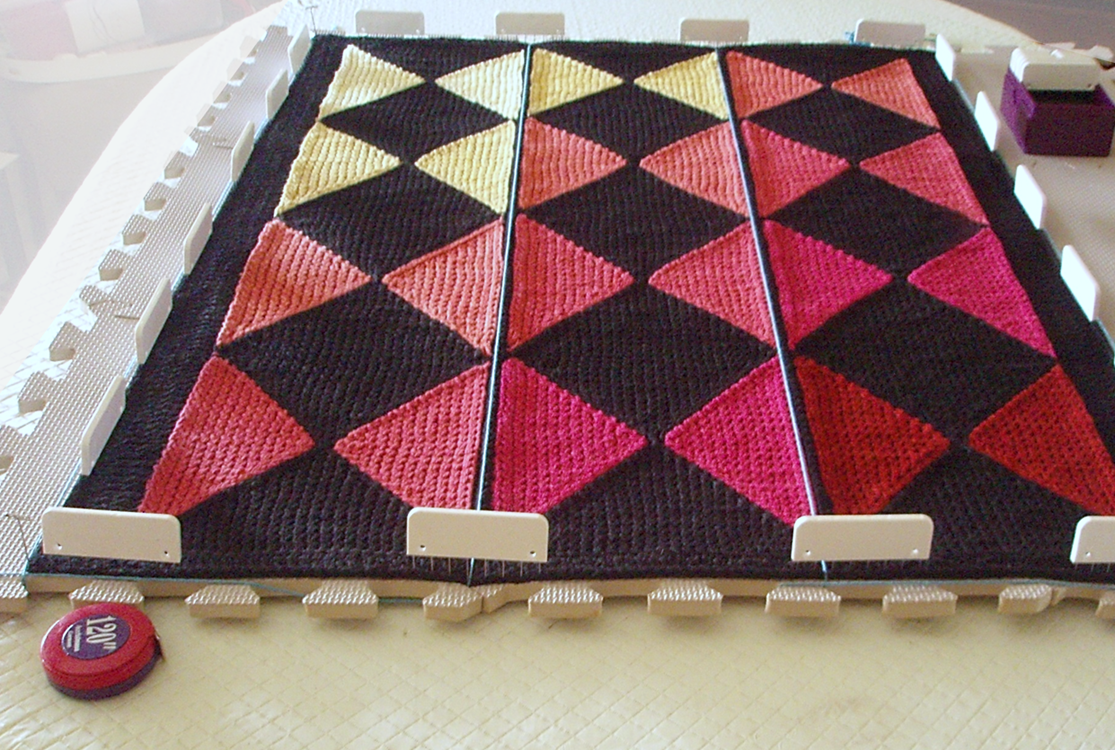

With the edge established, I begin spreading the entire piece over the blocking mats, continuing to run string lines between the top and bottom as needed. In this instance I ran four vertical lines (one for each edge and one for each seam).

I then start patting out the lumps and bumps, pinning things into place using the strings as a visual guide to align shapes, seams and edges.

I keep my tape measure handy and continue to make adjustments until the end result looks something like this:
In this instance, I was able to use the top and bottom mat edges as a lateral guide, but if I need horizontal lines, I simply follow the same strategy and run strings side to side. It's equally easy to establish diagonal guidelines for triangular shawls or other items with slanted shapes, and if I were making a pile of individual blanket squares, I'd get the strings in place, block the first square, then leave the strings in place, so I could block each subsequent square to the exact same dimensions.
One of these days, I may invest in mats with a pre-printed grid, but for now, this fast and easy trick helps me block straighter seams and edges to improve the overall look of the finished piece. Have your own favorite blocking tips? Feel free to share them in the comments below.
RELATED

Connecting with the linkups in the sidebar.
Great tip, thanks for sharing it!
ReplyDeleteYou're welcome, Carolyn, if you give it a try, let us know!
DeleteWhat a handy method. Thanks for sharing.
ReplyDeleteThanks, Ginx, hope it proves useful one day soon.
DeleteGenius! Thank you for posting this.
ReplyDeleteYou're welcome, Becki, hope it proves useful. It's lovely to see your smiling face :)
Delete